Table of Contents
Microsoft Word makes it easy to create a professional resume using either a built-in template or a blank document. The key is knowing how to structure your resume, choose the right format, and avoid common mistakes that can hurt your chances with employers and applicant tracking systems (ATS).
In this guide, we’ll walk you through how to make a resume on Word step by step. You’ll learn how to start from scratch or select a template, organize your information, and format each section to improve readability. By the end, you’ll have a resume that’s clear, professional, and ready for your next job application.
Want to save time and have your resume ready in five minutes? Try Zety’s Resume Builder. It’s fast and easy to use. Plus, you’ll get ready-made content to add with one click.
See more professional resume examples made with our builder.
One of our users, Chris, had this to say:
You cannot go wrong with Zety. The company does best at enhancing your resume and helping market yourself better to land the job you love.
Creating a Resume in Word: 2 Methods
You can create a resume in Microsoft Word by using a predesigned template or starting with a blank document. Templates help you get started faster, while a blank document gives you more control over the layout and formatting.
Understanding the differences can help you choose the method that best fits your needs and experience level.
Method 1: Use a Resume Template
Word offers a variety of built-in resume templates that provide a ready-made structure for your resume. Using a template can be a good option if you:
- Want to save time
- Prefer guidance on formatting and section organization
- Have limited experience creating resumes
- Need a professional-looking starting point
Keep in mind that some templates include design elements, such as columns, graphics, or text boxes, that may not work well with ATS. When possible, choose a clean, simple Microsoft Word resume template with standard section headings.
Method 2: Start With a Blank Document
Creating a resume from scratch allows you to build the document exactly how you want it. You’ll create each section manually, including your contact information, professional summary, work experience, skills, and education.
Starting with a blank document may be the better choice if you:
- Want complete control over the layout
- Need a customized resume format
- Have experience using Word’s formatting tools
- Prefer a simple, ATS-friendly design
While this approach takes more time, it gives you the flexibility to tailor your resume to your experience and career goals.
8 Steps to Create Your Resume in Microsoft Word
Creating a resume on Word involves choosing a template or a blank document, adding your key resume sections, and formatting it for readability and ATS compatibility. Follow the steps below to build a professional resume that presents your top qualifications.
Step 1: Open Word & Choose Your Starting Point
The first step in creating a resume in Word is deciding whether to use a built-in template or start with a blank document.
Here’s how to make a resume in Word using a premade template:
- Open Microsoft Word.
- Select File > New from the menu.
- Type “resume” into the search bar.
- Browse the available templates and click the one you like.
- Select Create to open the template.
- Replace the placeholder text with your own information.
Here’s how to make a resume in Word using a blank document:
- Open Microsoft Word.
- Select File > New.
- Click Blank Document to open a new file.
- Set up your basic structure by adding headings for your resume sections.
- Apply basic formatting to make your resume easy to read and ATS-friendly.
Follow the steps below to craft each section of your resume. You can use the writing guidance and formatting tips whether you’re starting with a blank document or adjusting the layout of a premade template to match your style and career goals.
Step 2: Add Your Contact Information
Include your contact information in your resume header so employers can quickly see who you are and how to reach you. Keep this section simple, clear, and easy to scan in seconds.
Start by adding your name as the first line of your resume. Go to the Home tab in Word and use a font size between 18 and 24 points. You can also click Bold to make your name stand out.
On the next line(s), add your key contact details using a 10- to 12-point font size:
- Phone number
- Professional email address
- Location (city and state are enough)
- LinkedIn profile URL
- Portfolio or personal website (if relevant)
Avoid adding photos, icons, or decorative graphics. Stick to standard text formatting so your contact information is easy for ATS and employers to read.
If you want a clean layout, use the Home > Paragraph > Center option to center your contact details. For a more traditional format, keep everything left-aligned.
To separate your header from the rest of your resume, you can also add a subtle horizontal line beneath your contact information.
In Word, you can do this by typing three hyphens (– – –) and pressing Enter, using Home > Borders > Bottom Border, or inserting a line through Insert > Shapes. Keep the line thin and simple so it improves structure without distracting from your content or affecting ATS readability.
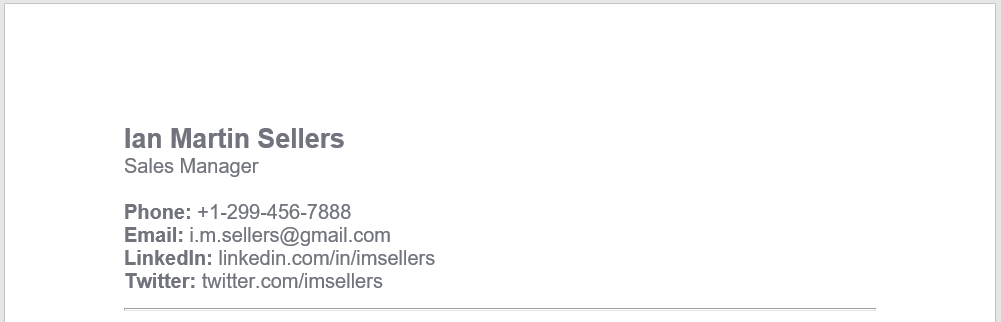
Here’s an example of what this section might look like:
Step 3: Write a Professional Summary
Add a professional summary directly under your contact information to quickly highlight who you are and the value you bring to employers.
Start by adding a section heading like “Professional Summary” in bold, 12- to 14-point font using the Home tab in Word. Then, write two to four sentences that highlight your strongest qualifications, career focus, and the value you bring to employers.
Focus on action-oriented content:
- Highlight your years of experience or relevant background.
- Add your top skills or areas of expertise.
- Mention the type of role you’re targeting.
- Include keywords from the job description when possible.
Keep your formatting simple by using standard paragraph text. In Word, go to the Home tab and confirm that your line spacing is set to 1.0 or 1.15 for better readability. Avoid using text boxes, tables, or unusual formatting, as these can cause issues with ATS.
Here’s an example of what this section might look like:

Step 4: Add Your Work Experience
Add your work experience section below your professional summary to show employers what you’ve done and the impact you’ve made.
Start by typing “Work Experience” as a section heading and bold it using the Home tab in Word. This helps clearly separate it from the rest of your resume. List your most recent job first, followed by previous roles in reverse-chronological order.
For each position, include your job title, company name, location, and employment dates. Keep this information consistent in formatting so it’s easy to follow.
Below each role, add bullet points to describe your responsibilities and achievements. In Word, go to Home > Paragraph > Bullets to create clean, structured lists. Each bullet should start with a strong action verb like “led,” “created,” “managed,” or “improved.”
Focus on results whenever possible. Instead of only listing tasks, highlight outcomes and measurable impact. For example, “Improved customer response time by 30%” is more effective than “Handled customer inquiries.”
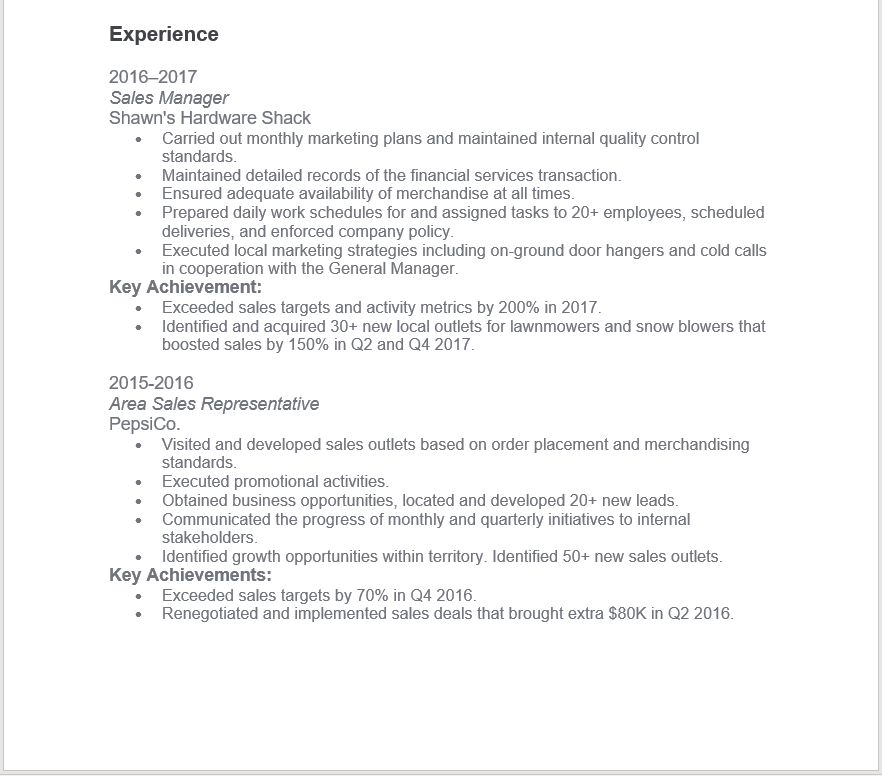
Here’s an example of what this section might look like:
Step 5: Include Your Education
Add your education section to establish your academic qualifications. Start by adding a bold section heading like “Education” using the Home tab in Word. Then list your education in reverse-chronological order (most recent first).
For each entry, include:
- Degree or certification earned
- School or institution name
- Location (city and state)
- Graduation date if recent (or expected graduation date)
If you’re early in your career, you can also include relevant coursework, academic honors, or achievements that support your application. Keep it selective and only include details that add value.
A simple, well-organized education section helps employers quickly understand your background and keeps your resume easy for ATS software to read.
Here’s an example of what this section might look like:

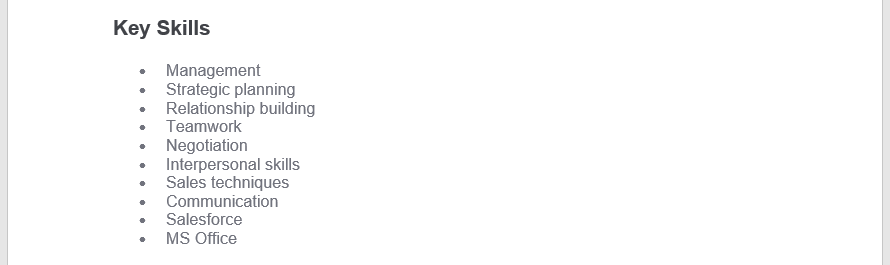
Step 6: List Job-Relevant Skills
Include a skills section to show employers what you can do at a glance. Start by adding a section heading like “Skills” and bolding it using the Home tab in Word. Next, choose the format that keeps your resume clean and easy to scan.
In Word, you can:
- Use bullet points by selecting Home > Paragraph > Bullets.
- Or, list skills in a single line separated by vertical bars (e.g., Customer Service | Data Entry | Microsoft Excel).
Focus on job-relevant skills rather than general abilities, and include keywords that appear in the job description when they accurately reflect your qualifications. Include both hard skills (like software tools, technical knowledge, or certifications) and soft skills that are relevant to the role.
Avoid graphics or skill charts because ATS tools often can’t read or interpret visual elements correctly, which may cause your skills to be missed. Keep spacing consistent across your resume so the document is easier to scan and looks professional.
Here’s an example of what this section might look like:
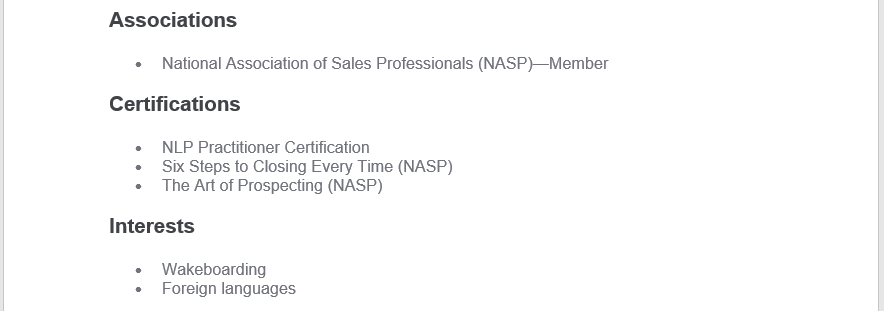
Step 7: Add Optional Supporting Sections
Add optional supporting sections to strengthen your resume and highlight additional qualifications that don’t fit into work experience or education. These sections help you stand out when they’re relevant to the role you’re applying for.
Start by adding a clear section heading in Word with the Home tab and bold formatting. Common headings for supporting sections include “Certifications,” “Projects,” “Volunteer Experience,” “Awards,” or “Languages.”
Only choose sections that add real value to your application. For example, certifications can show technical expertise, volunteer work can demonstrate leadership or commitment, and projects can highlight hands-on experience.
When you add details under each section, keep the formatting simple and consistent. Use clean bullet points from Home > Paragraph > Bullets to list each item, or use short single-line entries if the information is brief.
Here’s an example of what these sections might look like:
Step 8: Save & Export Your Resume
When you’re ready, save and export your resume. Start by reviewing your Word document and running a final formatting check before exporting.
Make sure everything follows a clean, consistent structure, including:
- Consistent font styles and sizes used throughout the entire document
- Even line spacing using Home > Paragraph > Line and Paragraph Spacing
- Standard margins set in Layout > Margins (such as Normal or Narrow)
- Clear and consistent section headings with proper bold formatting
- Proper alignment of bullet points and indentation
- No extra spaces, misalignments, or layout breaks
Once your resume looks clean and consistent, save your working file so you can edit it later. Go to File > Save As, and save it as a DOCX file to keep your resume fully editable.
Export a final version for applications by selecting File > Export > Create PDF/XPS or File > Save As > PDF. A PDF helps preserve your formatting so your resume appears more consistent across devices and systems.
Keeping both a Word and PDF version ensures you can update your resume easily while always having a polished, employer-ready file ready to send.
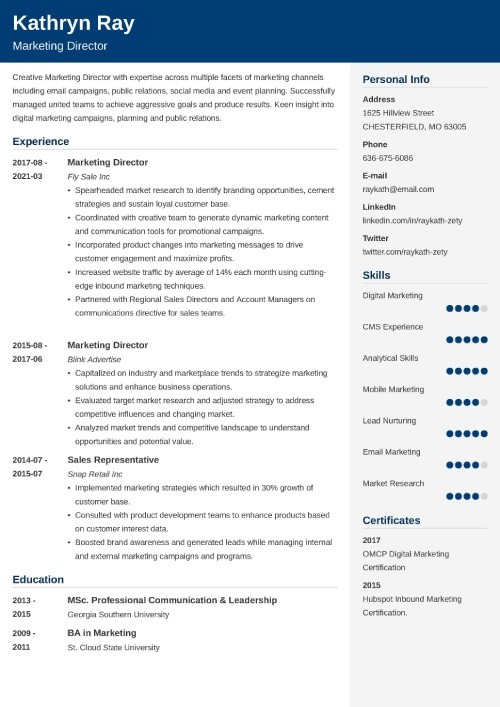
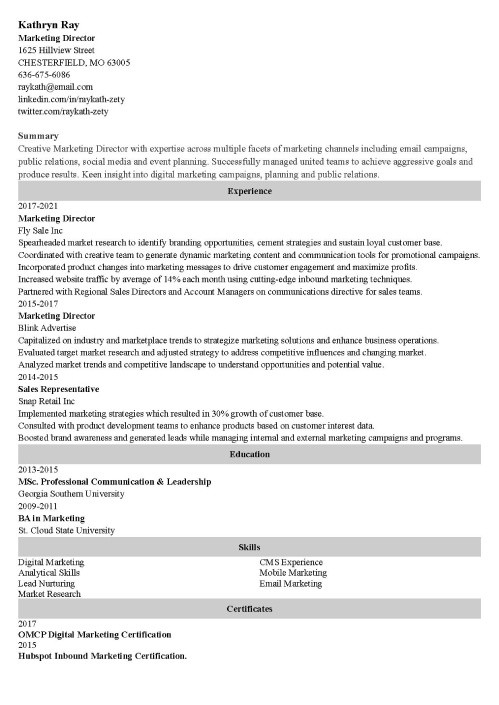
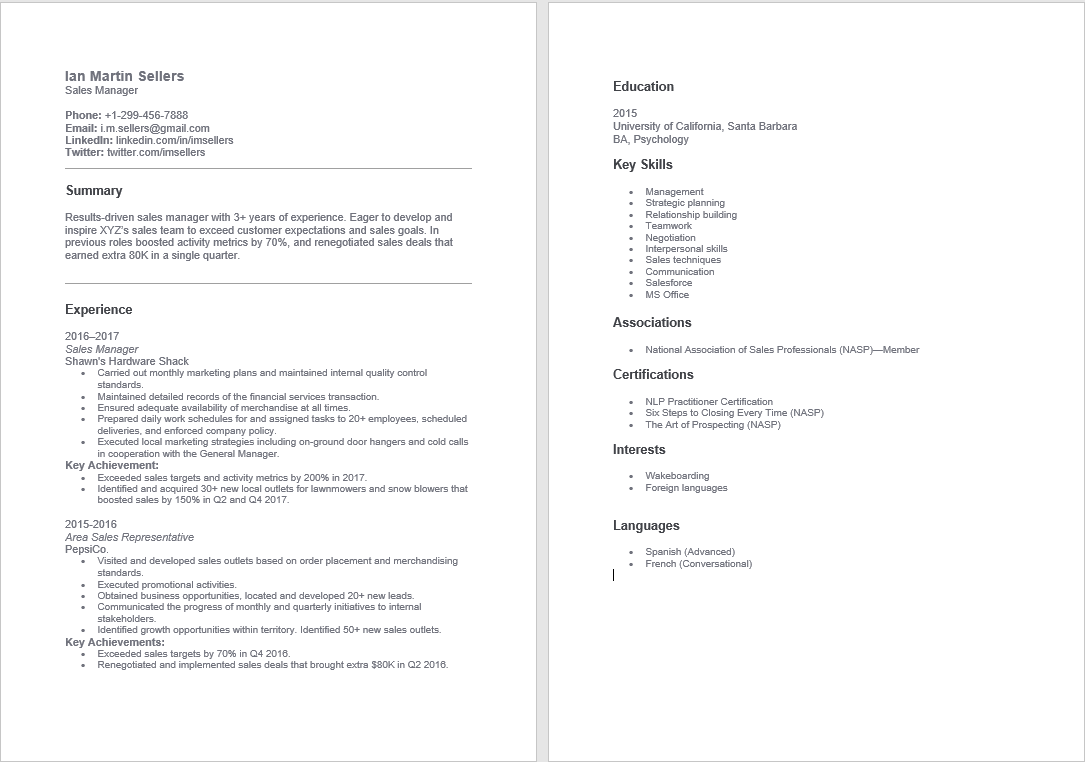
Here’s an example of what a finalized resume might look like:
If you want to create a recruiter-ready resume quickly, our Resume Builder does the heavy lifting for you so you don’t have to worry about formatting, spacing, or structure.
Making a resume with our builder is incredibly simple. Follow our step-by-step guide, use ready-made content tailored to your job, and have a resume ready in minutes.

When you’re done, Zety’s Resume Checker will score your resume and show you exactly how to improve it.
How to Format a Resume in Word: 5 Tips
Formatting your resume in Microsoft Word is what brings everything together. A clear, consistent layout makes your resume easier to read, helps employers quickly find key information, and ensures your experience is presented professionally.
1. Use a Resume Format That Fits Your Experience
Follow a resume format that matches your background and highlights your strengths. Here are the three formats that you can choose from:
- Chronological resume format: Lists your most recent experience first, works best for most job seekers with steady work history
- Functional resume format: Focuses on skills instead of work history, often used by career changers or job seekers with little or no work experience, though some employers and ATS platforms prefer chronological work history
- Combination (hybrid) resume format: Blends skills and work experience, useful for candidates with strong skills and relevant experience across different roles
2. Choose a Professional Font & Consistent Sizing
Stick with simple, widely-used resume fonts that are easy to read on screen and in print, such as Calibri, Arial, or Aptos. Keep your font sizing consistent throughout your resume:
- 18–24 points for your name
- 12–14 points for section headings
- 10–12 points for body text and bullet points
Avoid decorative or stylized fonts, since they can make your resume harder to read and less polished overall.
3. Set Standard Document Margins
Set your margins in Microsoft Word by going to Layout > Margins. The best practice is to use 1-inch margins on all sides, as this creates a clean, balanced layout that’s easy to read.
If you need to fit more content, you can reduce margins, but they should never go below 0.5 inches on any side. A common reduced option is the Narrow preset in Word, which sets margins to 0.5 inches.
4. Keep Line & Paragraph Spacing Consistent
Consistent spacing makes your resume easier to scan and improves its readability. In Word, use Home > Paragraph > Line and Paragraph Spacing to adjust this.
These best practices will keep your resume organized and easy to follow:
- Use 1.0 to 1.15 line spacing for body text.
- Add spacing between sections instead of extra blank lines.
- Keep spacing uniform across the entire document.
5. Avoid Complex Design Elements
Create a readable, ATS-friendly resume by avoiding complicated layout and design elements. A simple, text-based resume is easier for ATS software to read and ensures your information isn’t missed or broken during parsing.
Avoid using tables, text boxes, images, icons, columns, charts, or skill bars, as these elements can disrupt how your resume is processed and may cause sections of your content to be misread or skipped entirely.
Instead, use a clean, single-column layout with clear headings, standard bullet points, and consistent spacing throughout. This helps ensure your resume is both properly interpreted by ATS software and easy for hiring managers to scan.
Key Takeaways
Understanding how to do a resume on Word is all about combining a clear structure with clean, consistent formatting. When you follow a simple, step-by-step process and apply the right layout choices, you can build a professional resume that’s easy to read and ready for job applications.
Here are a few key takeaways to keep in mind:
- Start with either a Word template or a blank document based on how much control you want over layout and design.
- Keep your resume structure clear by using standard sections, such as “Contact Information,” “Summary,” “Work Experience,” “Education,” and “Skills.”
- Use simple, readable fonts, and keep sizing consistent throughout your document for a clean, professional look.
- Maintain standard margins, spacing, and alignment to ensure your resume looks balanced and organized.
- Focus on clear formatting over complex design elements so your resume remains easy to read across different systems.
- Always save your completed resume as both a Word file for editing and a PDF for submitting applications.
Frequently Asked Questions
How do I create my resume in Word for free?
You can create a resume in Word for free by using Microsoft Word Online or the desktop version if you already have access through Microsoft 365.
Open Word, select File > New, and choose a resume template or start with a blank document. From there, add your contact details, work experience, education, and skills using simple formatting tools. Save your file as a Word document or export it as a PDF when you’re finished.
How do I format a Word document for a resume?
To format a Word document for a resume, use 1-inch margins, a professional font such as Calibri or Arial, and consistent spacing. Keep body text at 10 to 12 points, headings at 12 to 14 points, and your name at 18 to 24 points. Use single-column layout, clear section headings, and bullet points to organize information so it’s easy to read and scan.
Does Word have a resume template?
Yes, Microsoft Word includes built-in resume templates you can use to create a resume quickly. You can find them by opening Word, going to File > New, and searching “resume” to browse available options. Some of these templates are free to use, while others are premium and require a Microsoft 365 subscription.
Which Word resume format is best?
The best resume format to use in Word is the reverse-chronological format. This layout lists your most recent experience first and works well because it’s easy to read, widely recognized by employers, and simple to build using Word templates or a blank document. It clearly shows your career progression and makes it easy for hiring managers to scan your experience.
About Zety’s Editorial Process
This article has been reviewed by our editorial team to make sure it follows Zety’s editorial guidelines. We’re committed to sharing our expertise and giving you trustworthy career advice tailored to your needs. High-quality content is what brings over 40 million readers to our site every year. But we don’t stop there. Our team conducts original research to understand the job market better, and we pride ourselves on being quoted by top universities and prime media outlets from around the world.
Share: